Calibration flow for Fcs mode
Fast camera start (Fcs)
Amebapro2 support specific flow to get first frame as soon as possible
Concept:
Use ALS (Ambient light sensor) to get roughly initial value
Pro2 bring up sensor & isp asap with quick convergence flow
Time to first frame (T2FF) is generally less than 200ms
Time to available first frame (T2AFF) is generally less than 300ms
Both of SW & HW should be specific designed for FCS flow
HW Architecture for FCS mode (P4)
SW Architecture for Fcs mode (P5)
HW Architecture for FCS mode
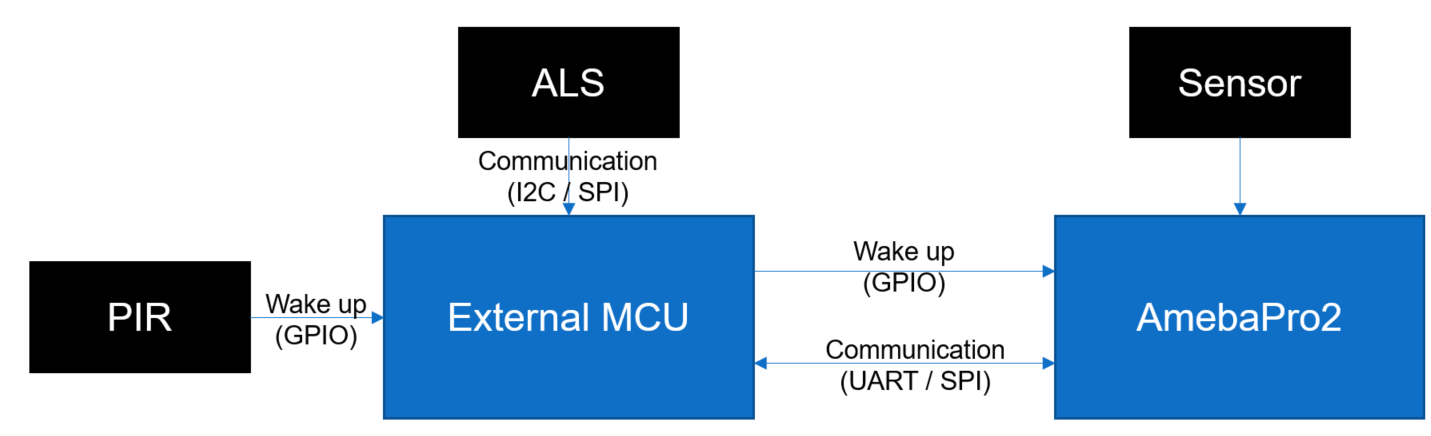
Wake up from PIR flow
PIR trigger MCU (wake up from GPIO)
MCU enable ALS (start for ALS convergence)
MCU trigger AmebaPro2 (wake up from GPIO)
Pro2 bring up sensor at rom code stage
Pro2 communicate with MCU to get ALS information at bootloader stage
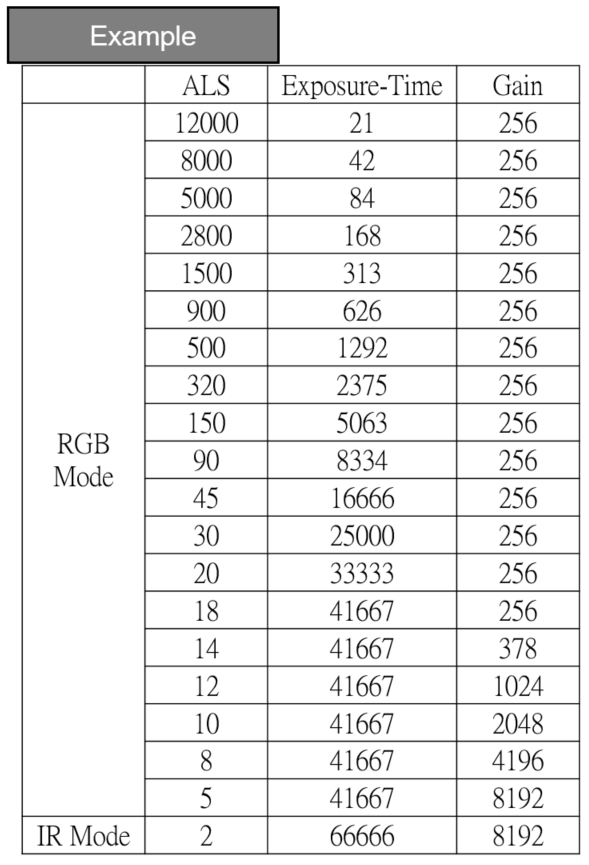
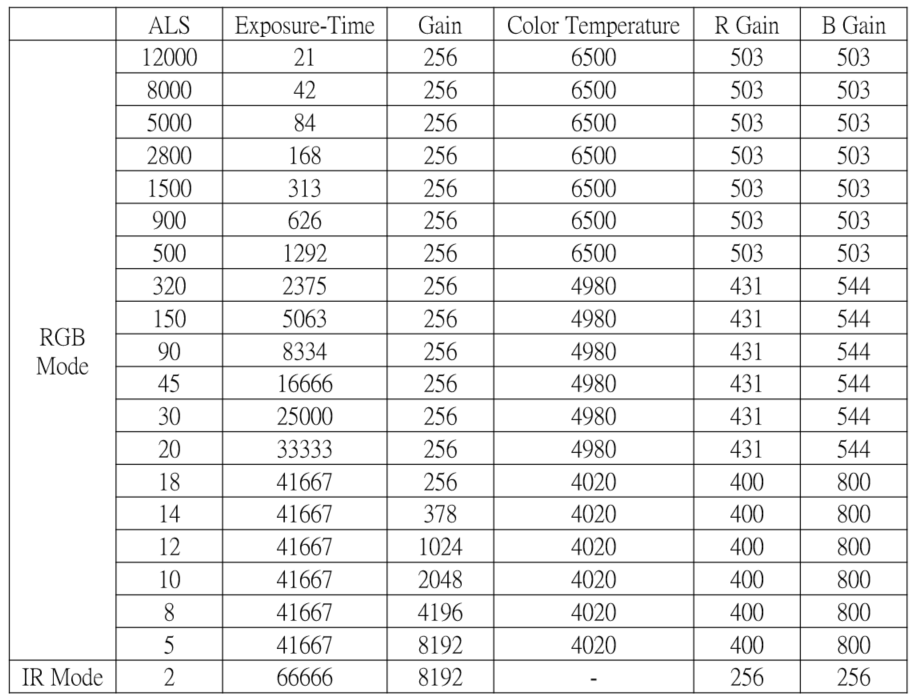
Pro2 use lookup table (LUT) to get initial value (Exposure time & gain)
Pro2 enable Fcs flow at bootloader stage
Pro2 enter application code (main code stage) and get video or snapshot
SW Architecture for FCS mode
SW related function for FCS flow
Fcs sensor driver (used at rom code stage)
IQ configuration (used at bootloader stage & main code stage)
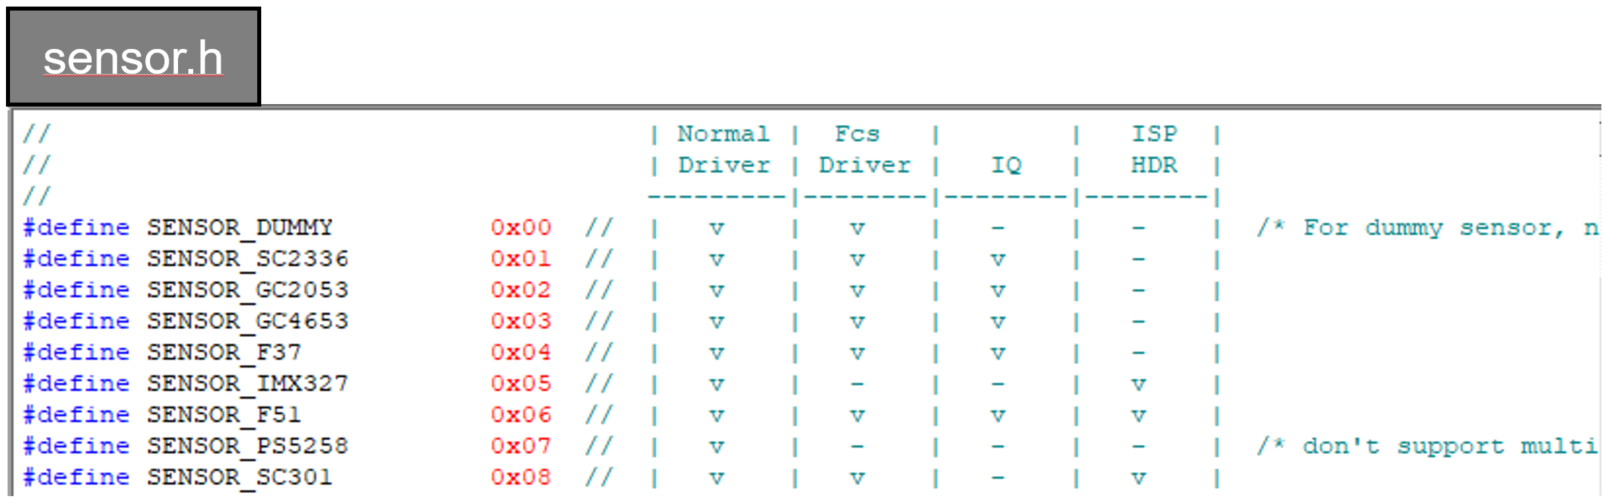
Customer could check SDK for FCS AVL (sensor.h)
Lookup table (used at bootloader stage)
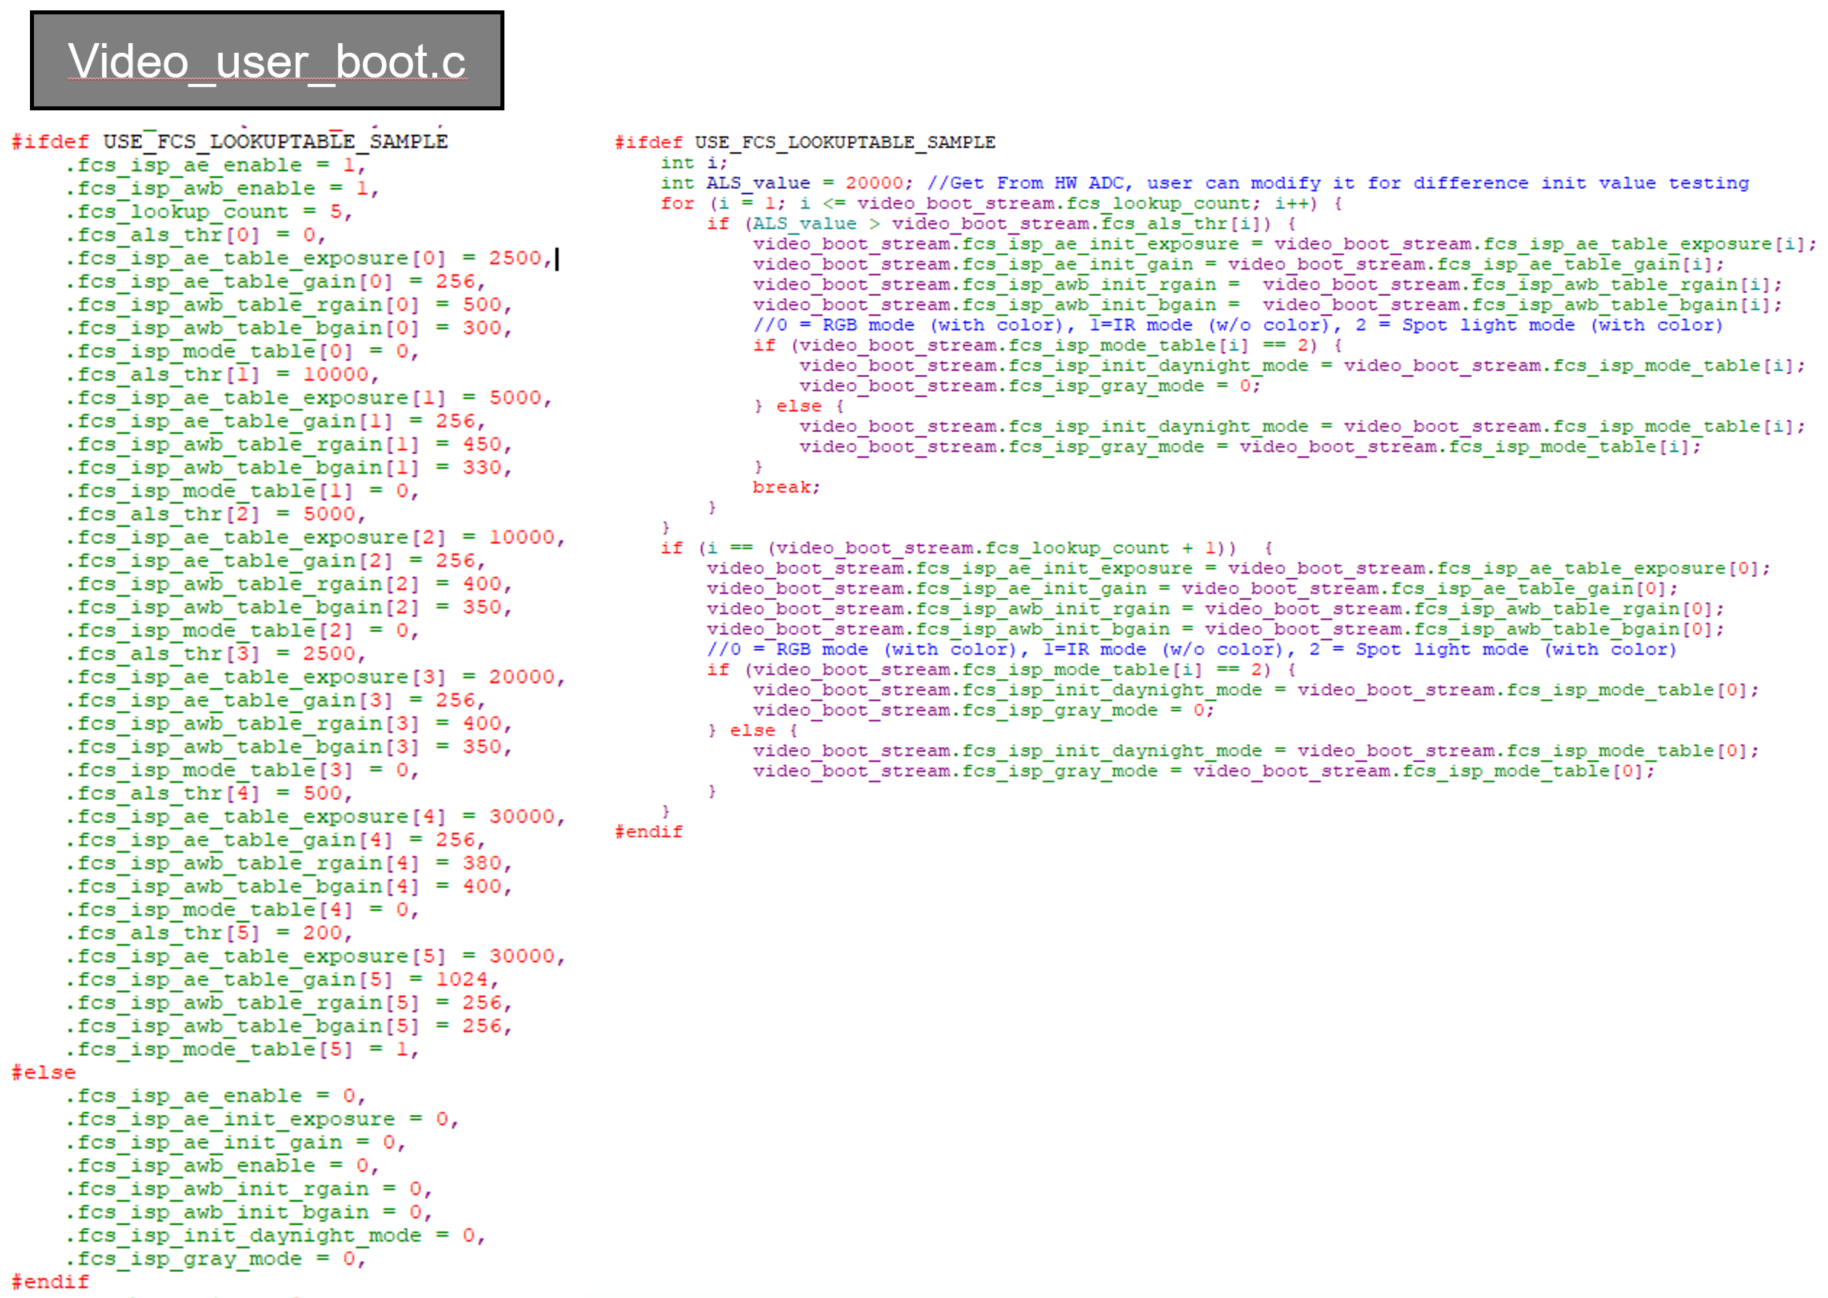
video_user_boot.c
Need to calibrate for ALS & ISP information (AE & AWB)
Pre-define for look-up table (LUT)
Sample code
#define USE_FCS_LOOKUPTABLE_SAMPLE
Get ALS_value through SPI / UART with MCU
Calibration flow (Auto Exposure) – (1)
Calibration flow (Auto Exposure) – (2)
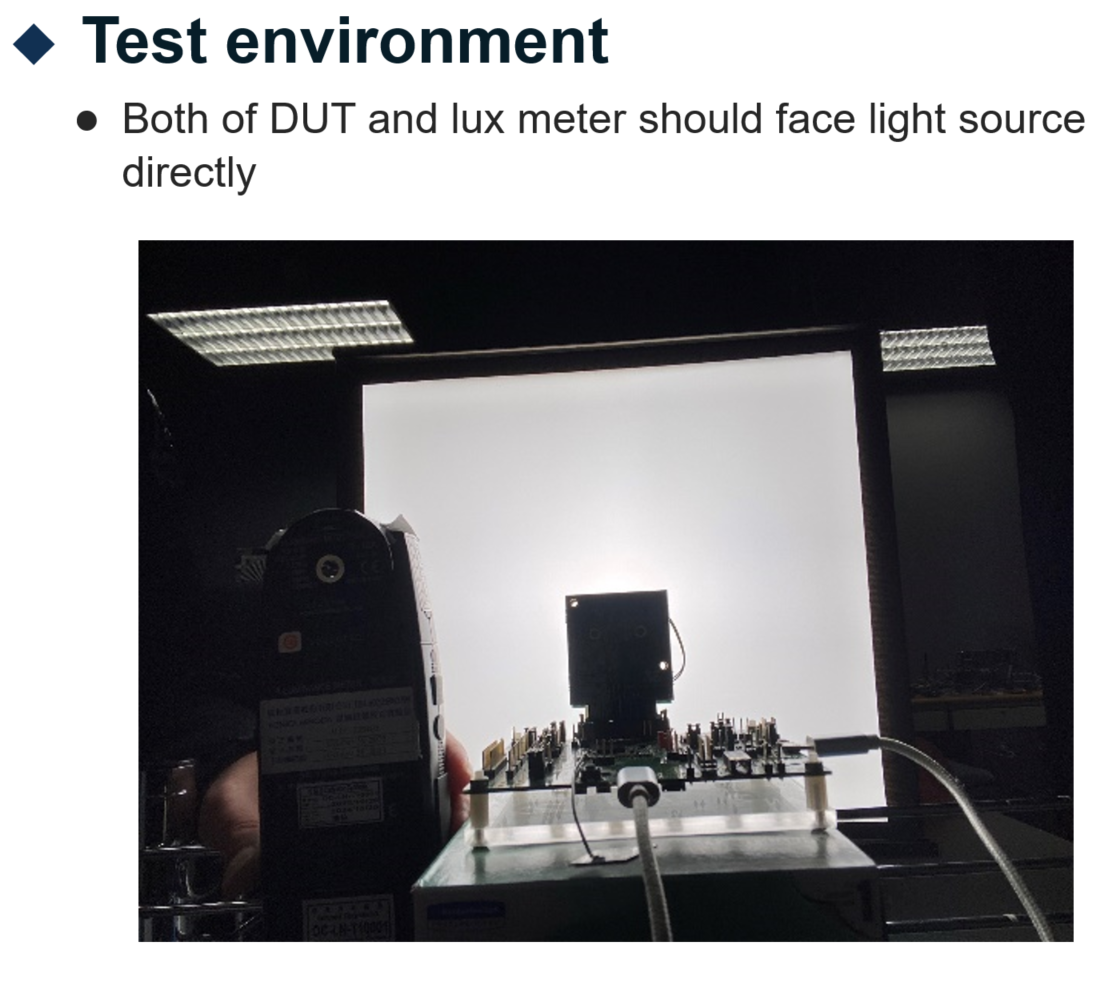
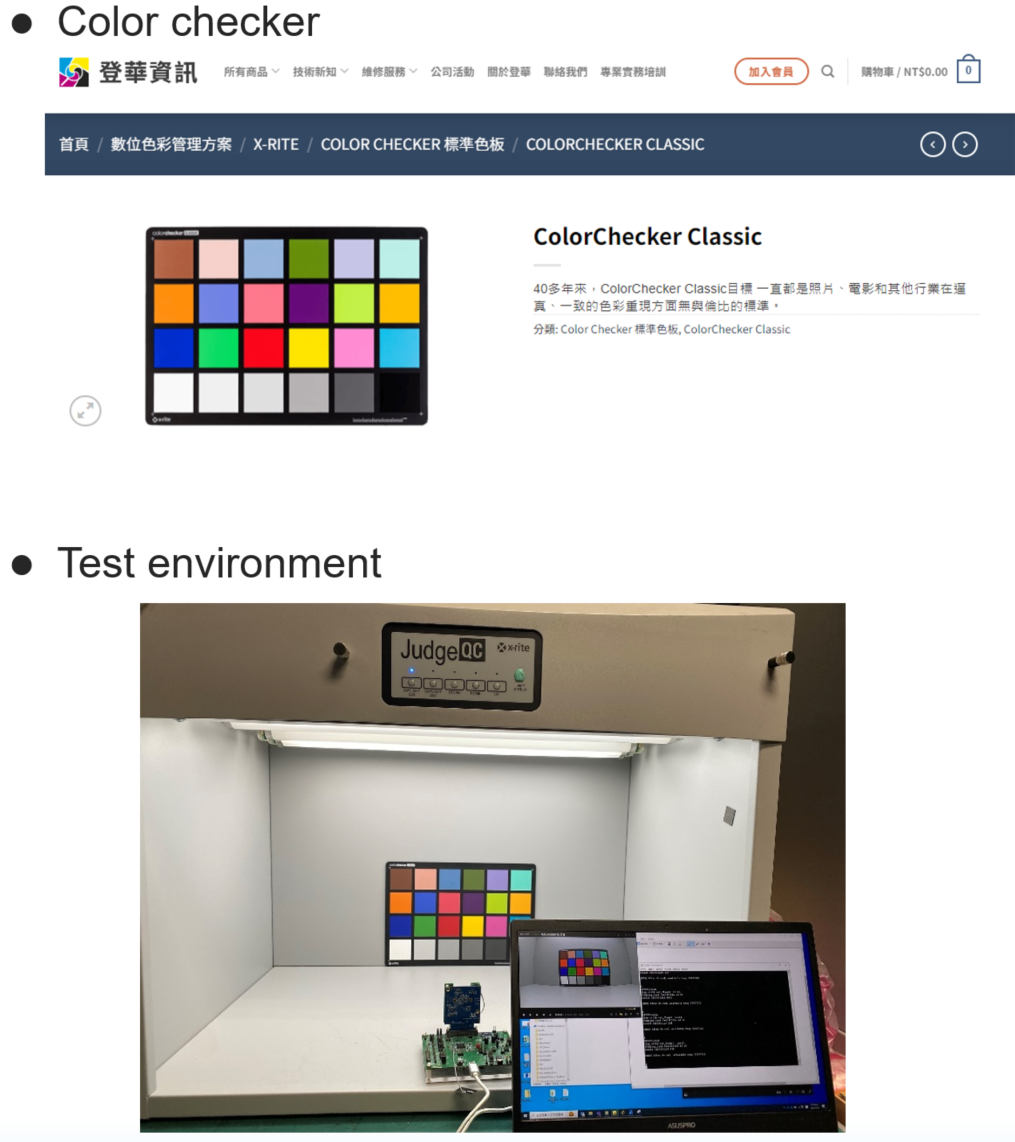
Test flow
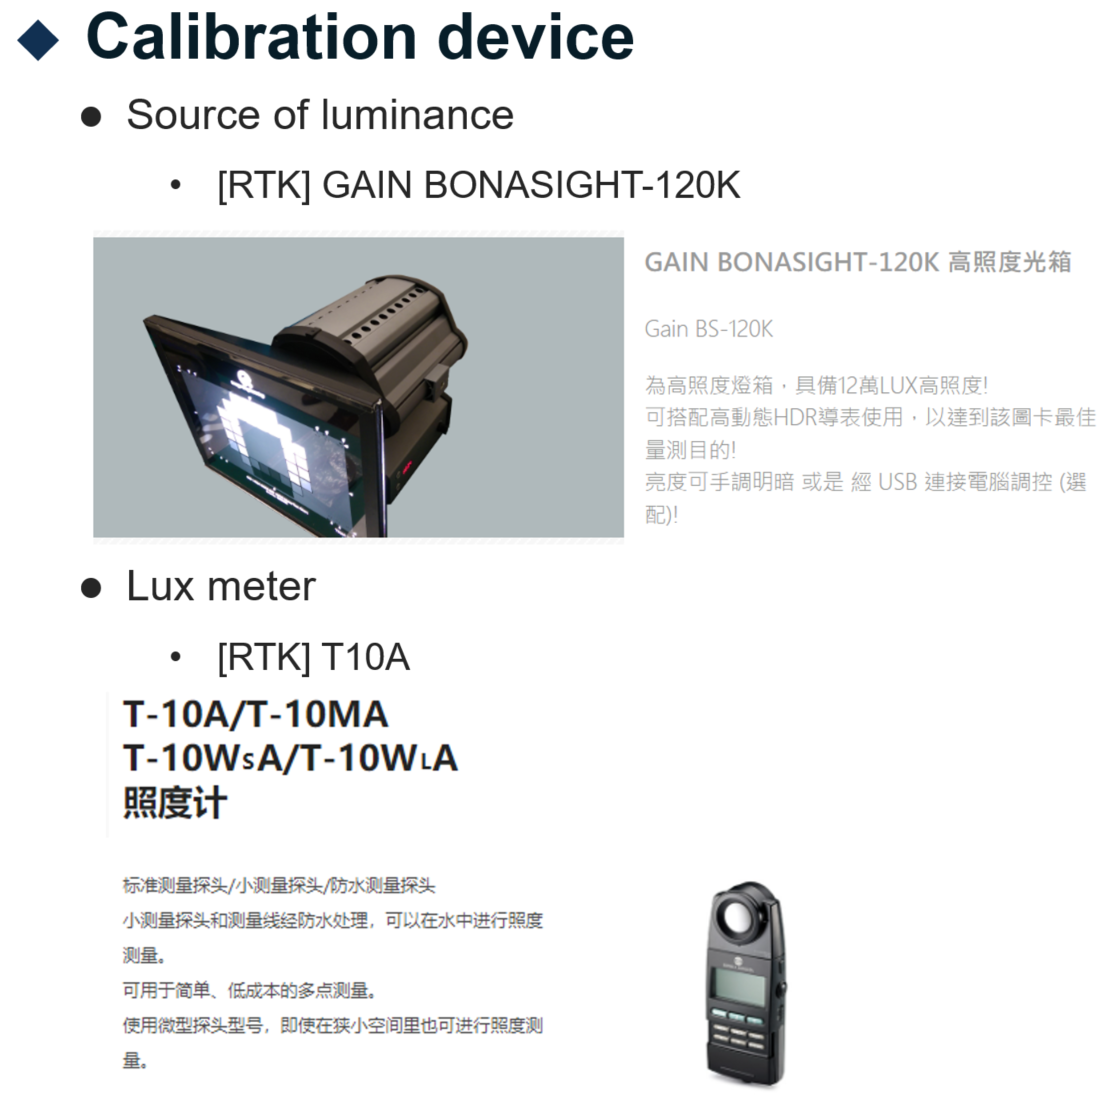
Set environment
Adjust strength of luminance source
1st step adjust luminance strength to Max level
Next step could be 1/2 ~ 2/3 of previous step
Check ALS & ISP information for LUT
Customer should implement ALS and read function
Check P11 for ISP command (AE)
Repeat 2 & 3 until finish LUT
Calibration flow (Auto White balance) – (1)
Calibration flow (Auto White balance) – (2)
Test flow
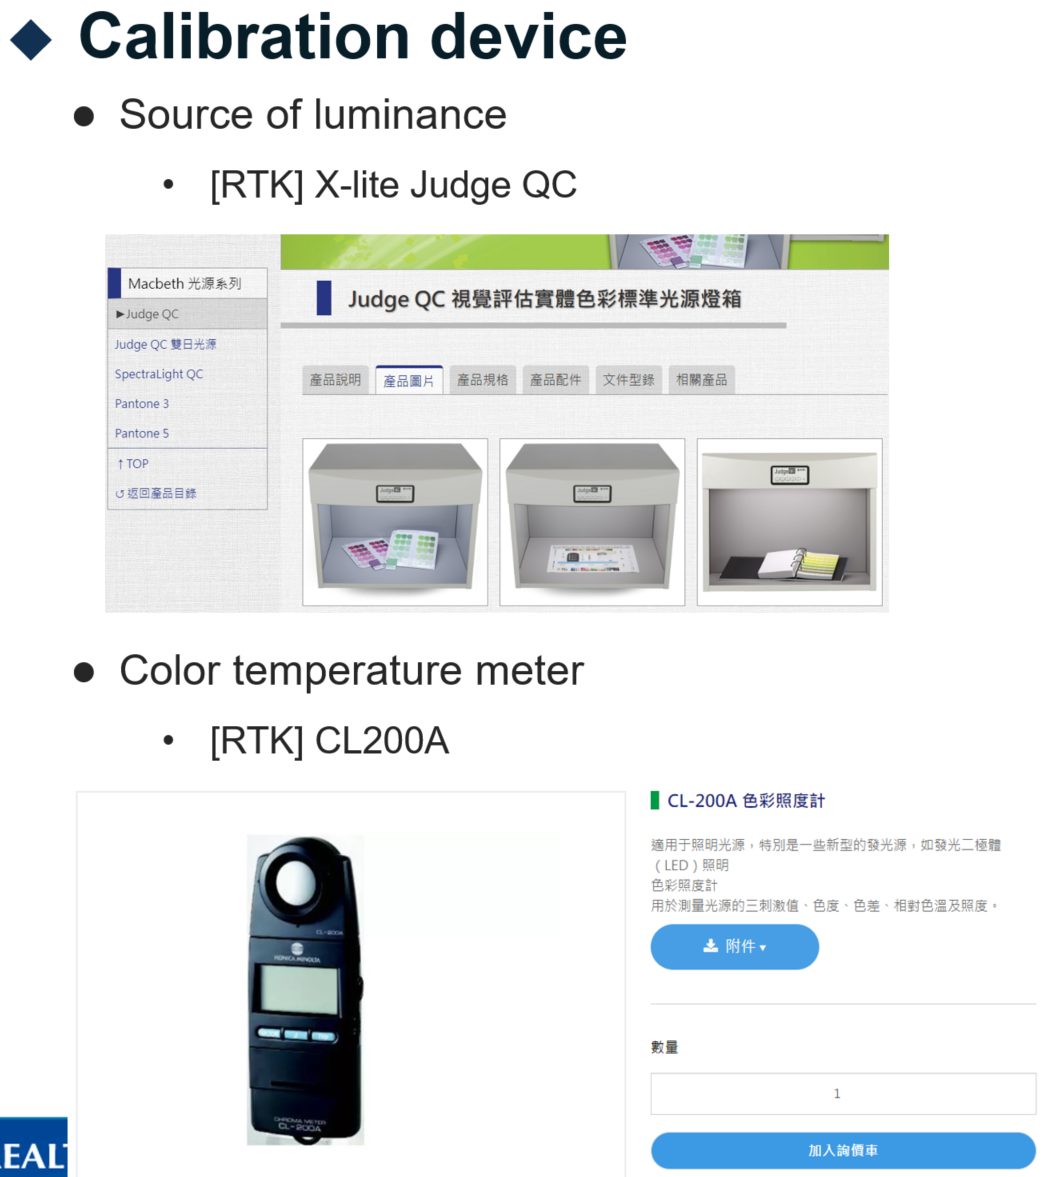
Set environment
Adjust color temperature to D65 & check ISP information for LUT
Adjust color temperature to D50 & check ISP information for LUT
Adjust color temperature to TL84 / CWF & check ISP information for LUT
Check P12 for ISP command (AWB)
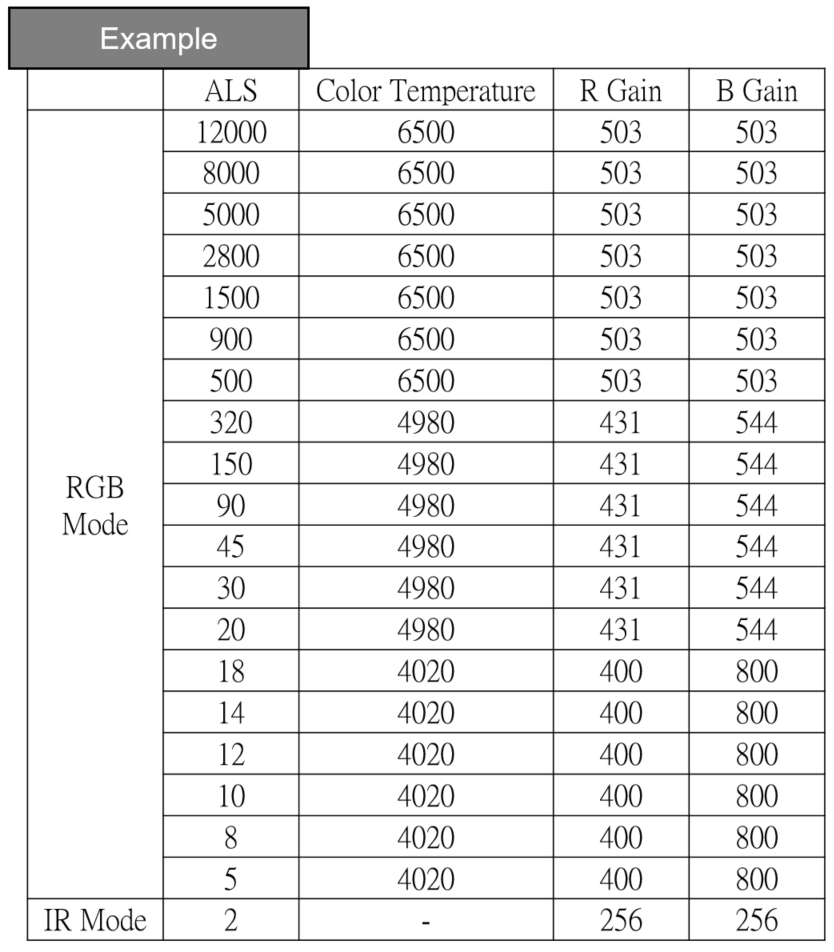
Calibration result
ISP command (AE)
How to enable ISP AT-Command
Default ISP command is enabled in SDK configuration
Check platform_opts.h for define flag

Set Power frequency (50hz / 60hz)
Ref: isp_get_power_line_freq
ATIC=1,0x18,value (value = 0 (off), 1 (50hz), 2 (60hz), 3 (Auto – default)
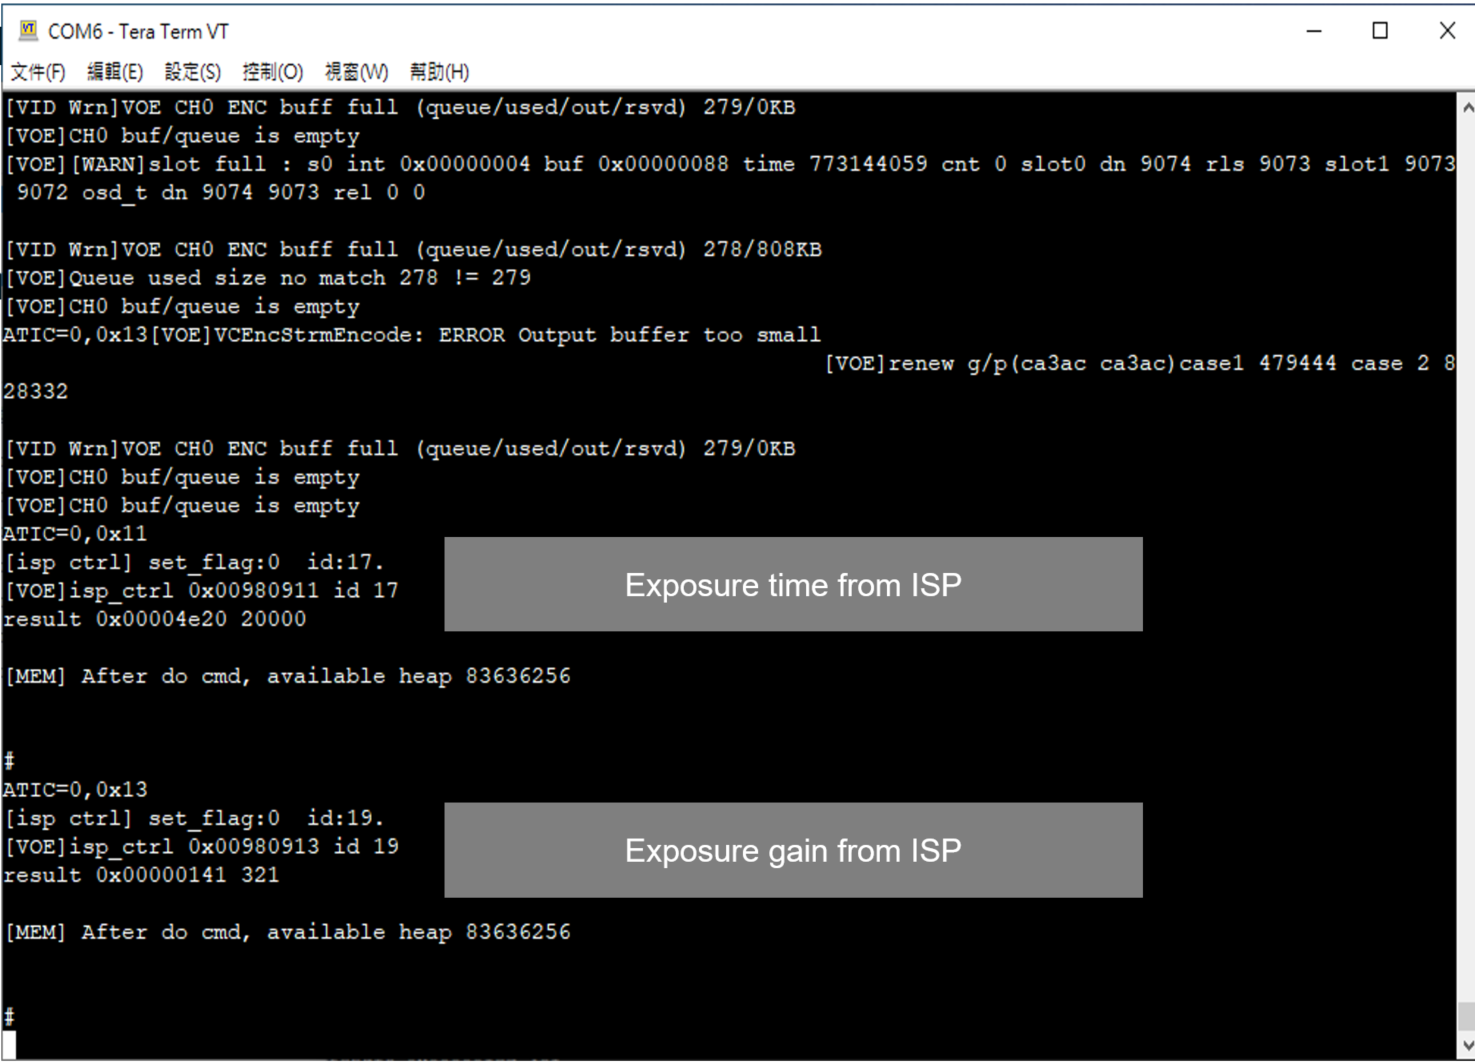
Get Exposure time (AE)
Ref: isp_get_exposure_time
ATIC =0, 0x11
Get Exposure gain (AE)
Ref: isp_get_ae_gain
ATIC=0,0x13
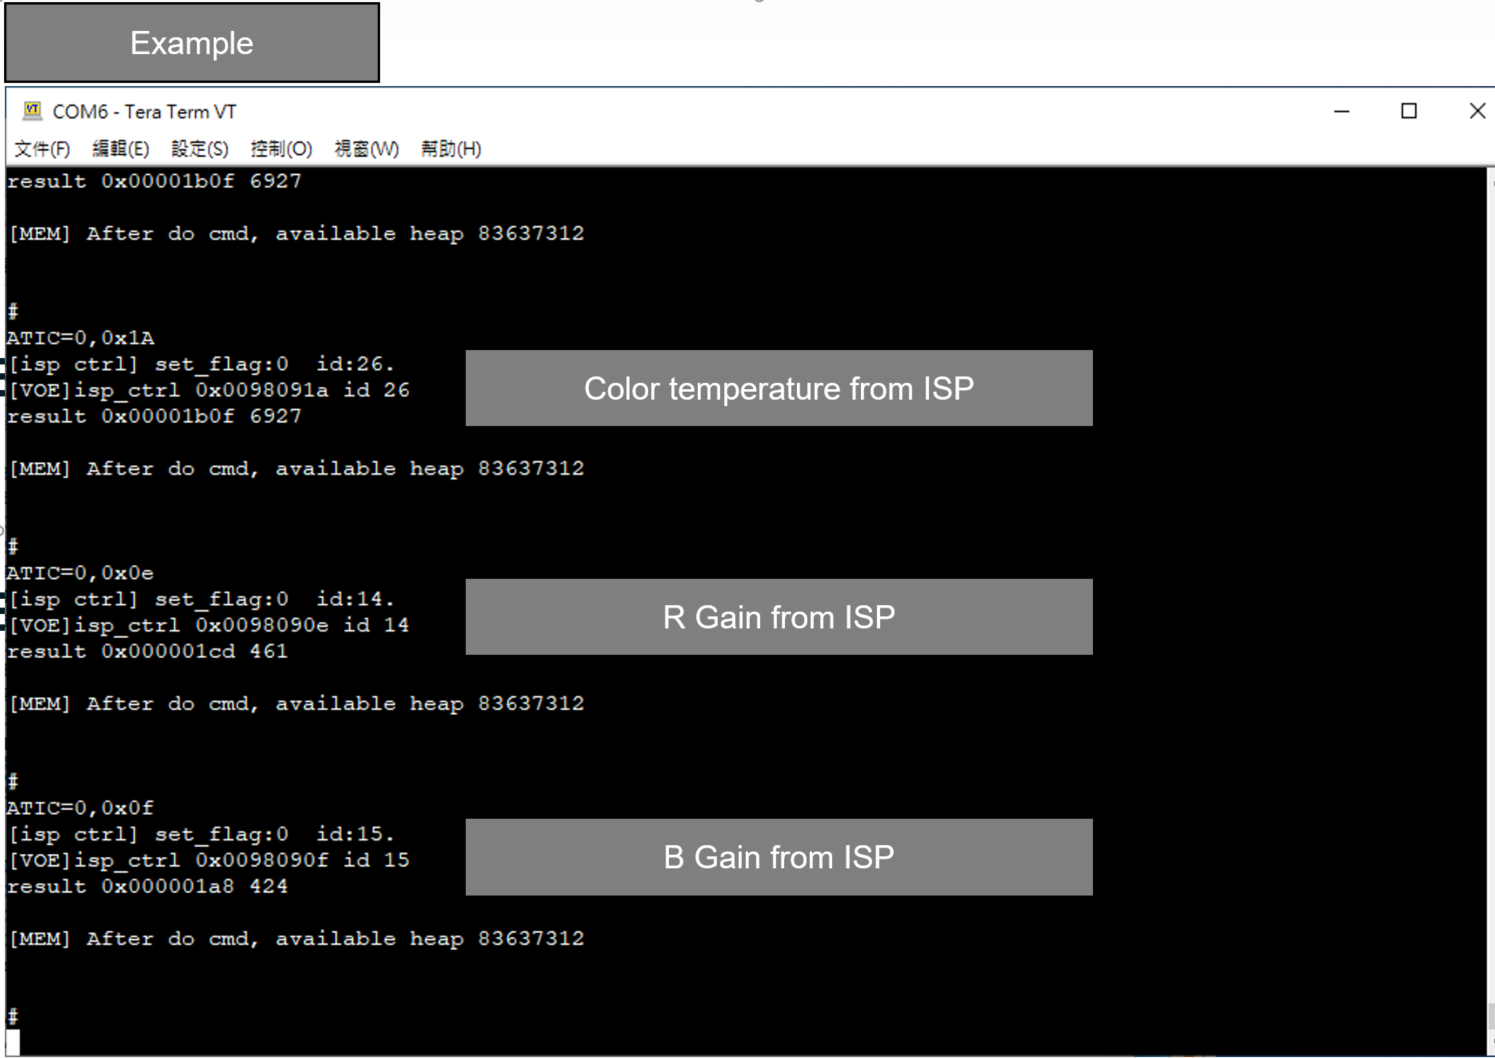
Get Color temperature (AWB)
Ref: isp_get_wb_temperature
ATIC=0,0x1A
Get White balance R-Gain (AWB)
Ref: isp_get_red_balance
ATIC=0,0x0E
Get White balance B-Gain (AWB)
Ref: isp_get_blue_balance
ATIC=0,0x0F