UVC FW Compiled for IQ Tuning ENG
1. Compilation environment preparation
The SDK compilation environment and method are as follows: Install mingw with ASDK
https://www.msys2.org/ to download msys64 and un-zip it
Download and install cmake: https://cmake.org/download/
Export cmake in mingw’s bashrc
Click msys2_shell.cmd to open mingw, modify the .bashrc and reclick the msys2_shell.cmd to export
open msys64-1210\msys64\home\xxx\.bashrc
Add the export PATH=/JLink:$PATH:/mingw64/bin:/c/Program/Files/CMake/bin
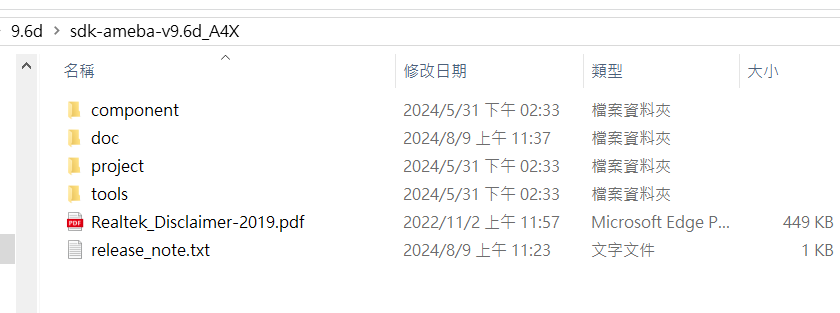
Get the SDK from RTK
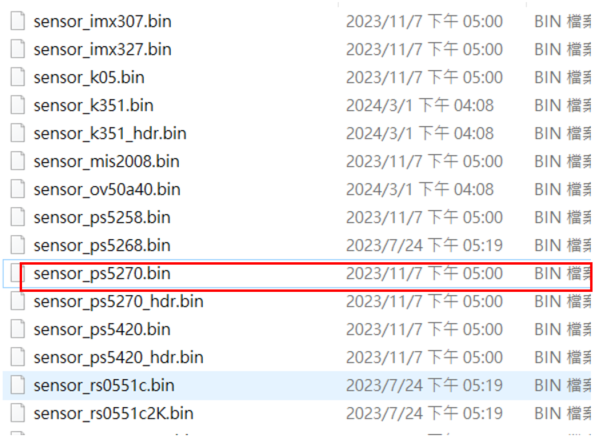
Make sure the Sensor driver that you need in SDK
component\soc\8735b\fwlib\rtl8735b\lib\source\ram\video\voe_bin (example:PS5270)
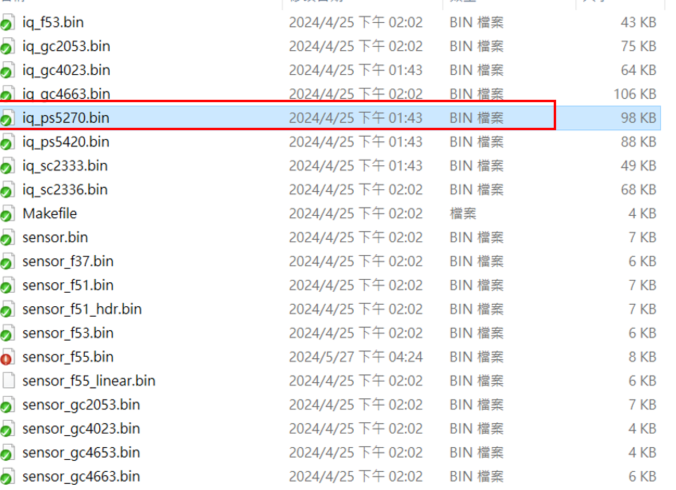
f. Make sure the IQ.BIN(Full IQ) that you need in SDK component\soc\8735b\fwlib\rtl8735b\lib\source\ram\video\voe_bin (example:PS5270)
Compile FW and merge IQ.BIN into SDK. The required IQ.BIN in SDK must be Full IQ
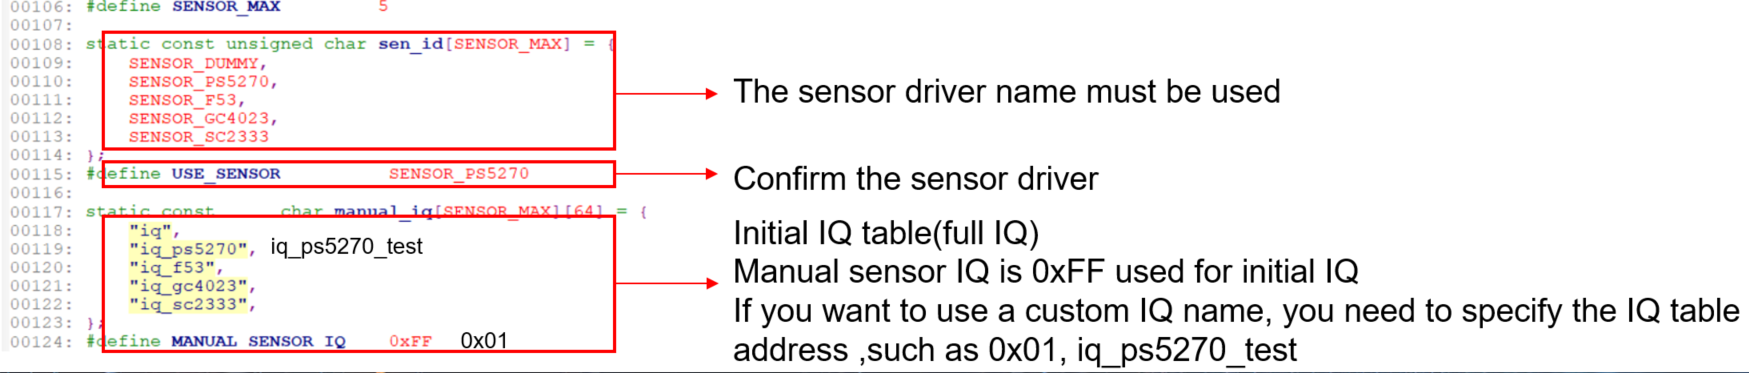
Confirm the corresponding Sensor information and enable the IQ tuning function
Reference file
project\realtek_amebapro2_v0_example\inc\sensor.h
project\realtek_amebapro2_v0_example\inc\platform_opts.h

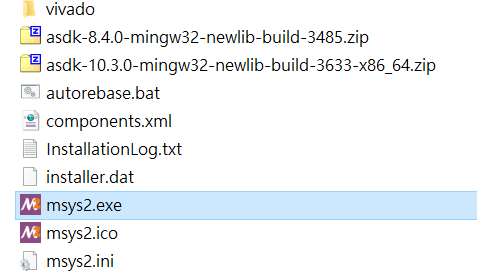
2. Compile the firmware required for IQ Tuning
Click the ASDK-msys2.exe
Enter the SDK path to be compiled
/project/realtek_amebapro2_v0_example/GCC-RELEASE
Create the build folder
mkdir build
Enter the build folder

Type the following command
cmake .. -G”Unix Makefiles” -DCMAKE_TOOLCHAIN_FILE=../toolchain_ci.cmake -DEXAMPLE=media_uvcd
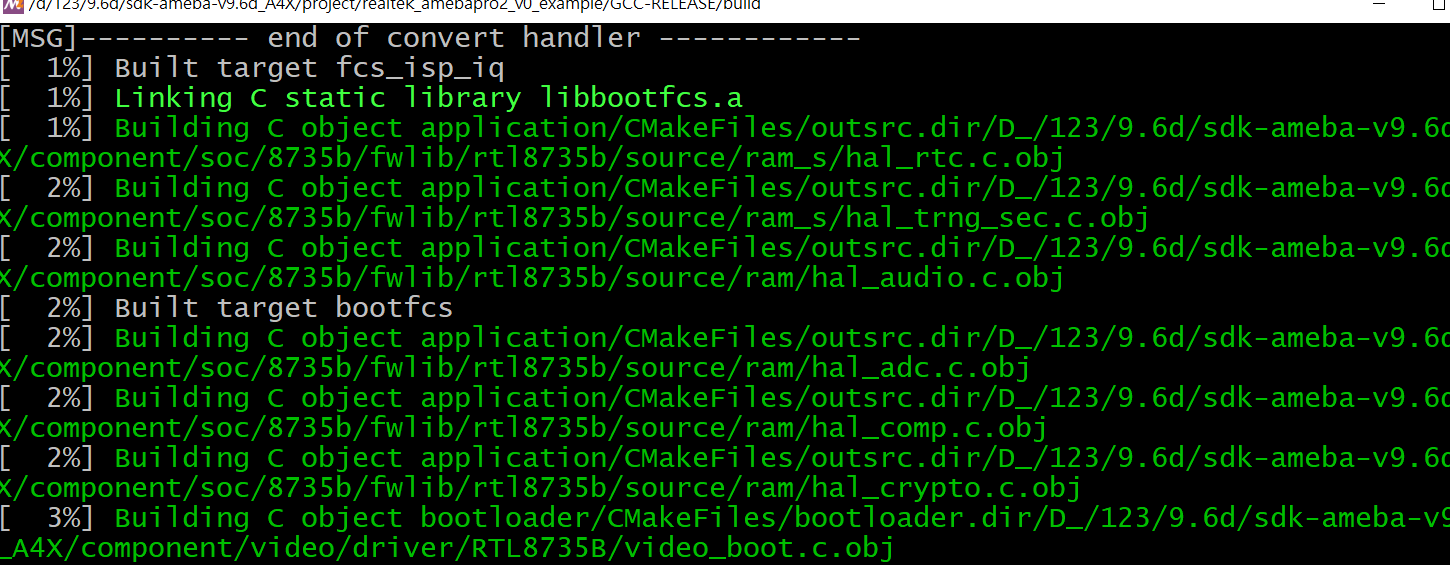
f.After the execution is complete, enter the following command to compile
cmake –build . –target flash
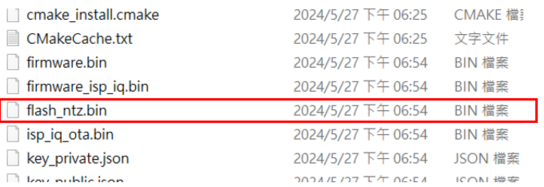
Find the required UVC FW in the folder
3. Burn UVC FW into the device and turn on RealCam for detection
The following figure shows the EVB development board and mini82 development board provided by RTK
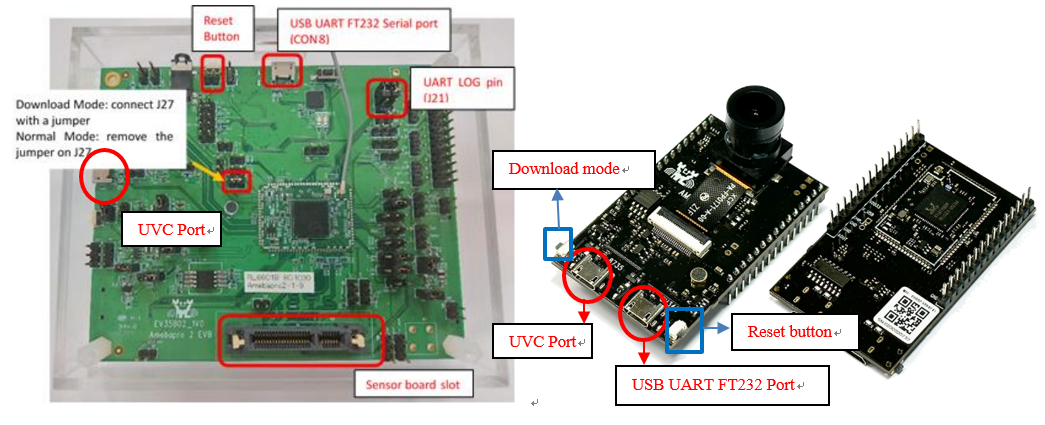
Use a jumper to connect J27 Pin on AmebaPro2 EVB and press the reset button to enter the burning mode
Press the download mode button and reset button on both sides of AmebaPro2 mini82 at the same time to enter the burning mode
Use PG tool to burn FW
Type input uartfwburn.exe -p comXX -f .\filename.bin -b 1000000 -U
The XX part is the com port and the file name
After the progress bar finishes running, download success will appear

Restart the device after the burning is complete
The log file at startup will be display information as shown in the figure, allowing users to confirm sensor, iq and VOE version information

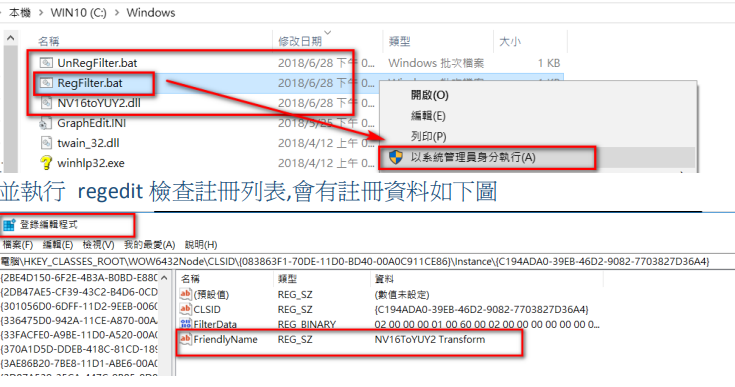
4. Register the NV16 and NV12 decoding batch required by RealCam
After decompressing the two batches of NV16toYUV and NV12toYUV provided by RTK, copy the registration files to C:\Windows directory and register as a system administrator
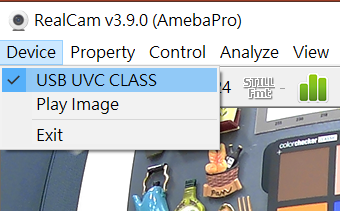
5. Turn on RealCam for detection
Enable USB UVC class and confirm that the tuning tool can output images
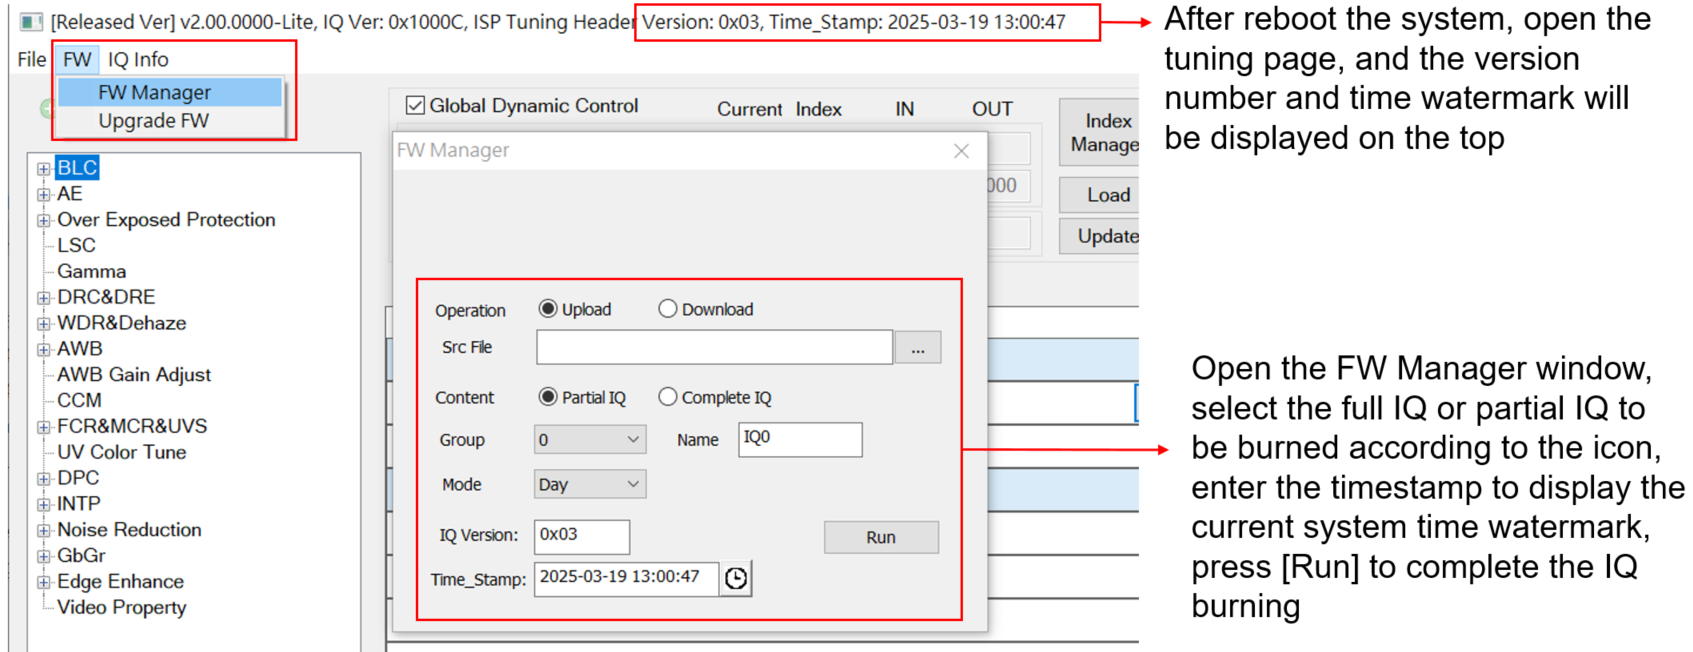
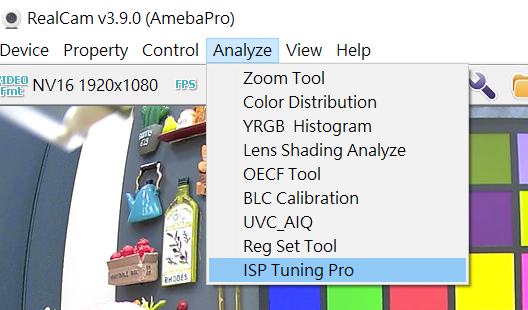
Turn on the tuning page
6. Import IQ parameters (burn IQ parameters to device)
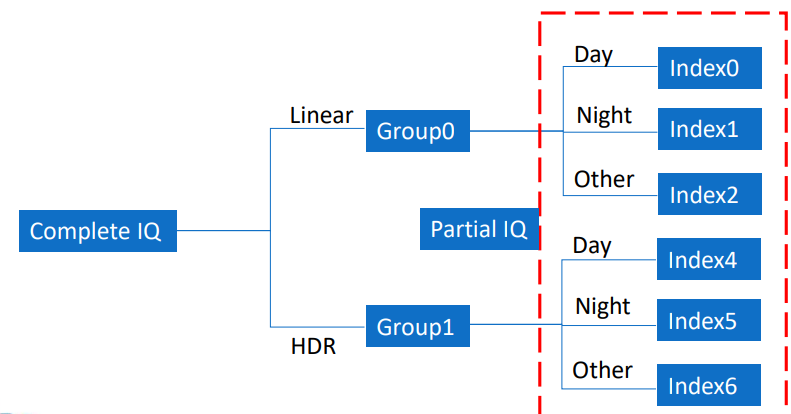
In the Amebapro 2 chip, the IQ parameters exist in a bin file.
Full IQ : It contains the parameters adjusted by different exposure modes, each mode consists of three modes, consisting of 6 IQ tables in total.
Partial IQ: The IQ parameters in each mode can also be an independent file, which can also be imported into Partial IQ.
Package the separately adjusted partial IQ into a complete full IQ. Please refer to the RTK file AmebaPro2 FW_Tool_230105.pdf
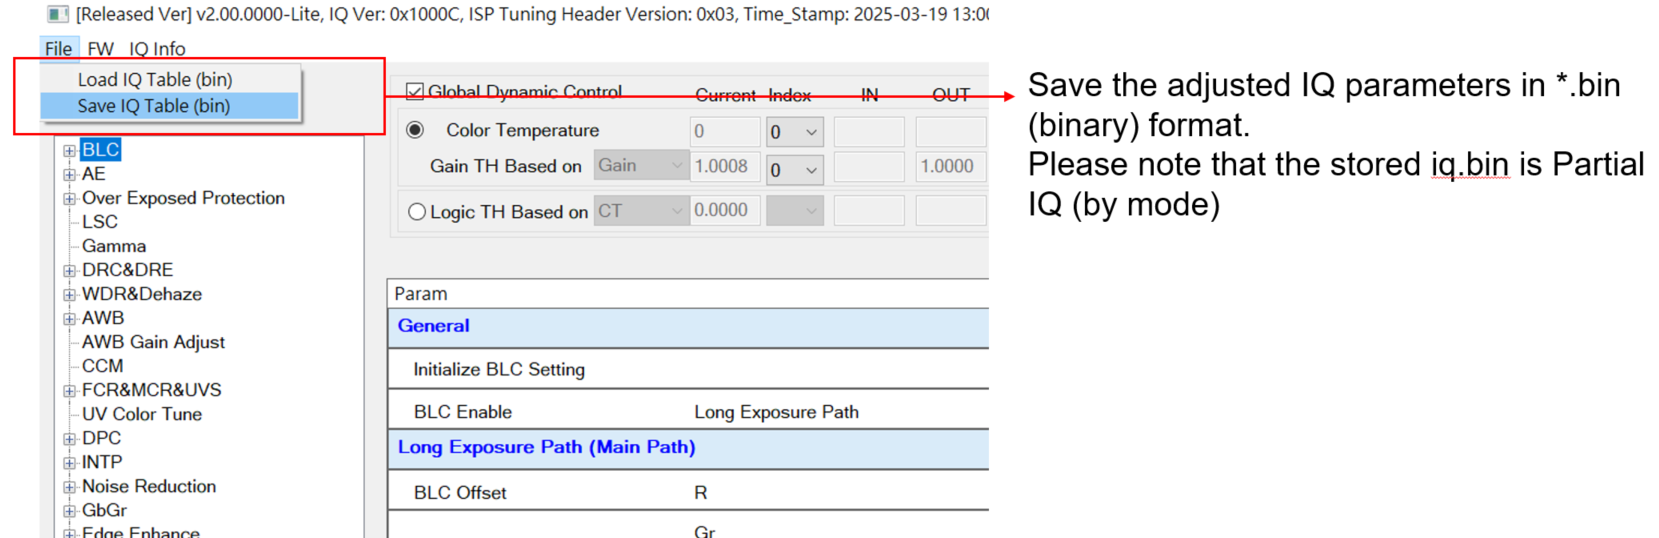
Export IQ parameters
After the image parameters are tuned and updated to the IQ Table, the IQ parameters need to be transferred from RealCam Pro to Export(Partial IQ)
The exported parameters will be saved in the file format of *.bin (binary)
Each tuning mode will have its own Partial IQ file
Use RealCam to burn IQ.BIN
The RealCam tool has a built-in IQ.BIN function, which can burn the complete Full IQ and the separate Partial IQ